


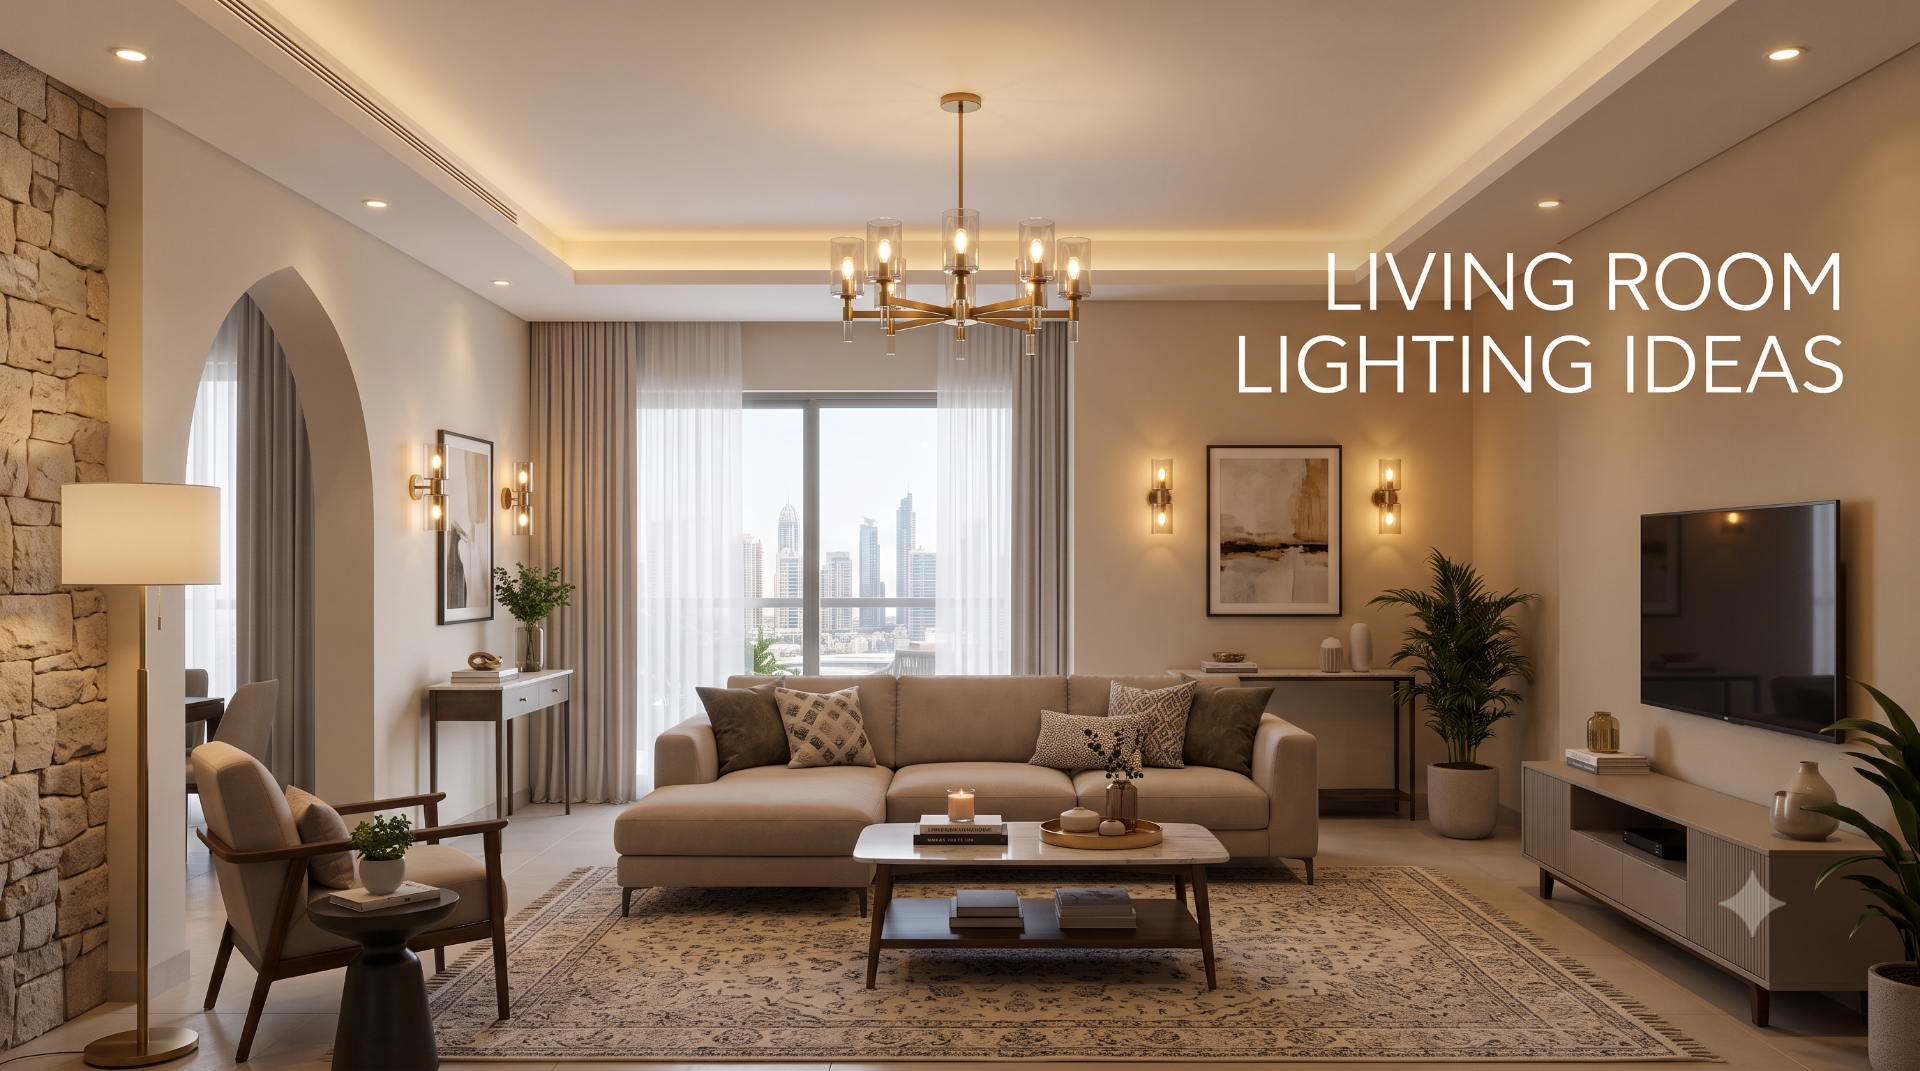
Most people notice lighting only when it goes wrong. A glare spot on the TV, a corner that always feels gloomy, a room that looks lovely in photographs yet never quite feels relaxing in person. Light sits behind almost everything we feel in a space, and the living room, where we spend most of our waking hours at home, shows its effect more than any other room.
Good living room lighting design is less about buying striking fittings and more about deciding what each light should do. This guide is organised by layer, so you can build a plan step by step, whether you live in a city apartment, a suburban family home or a house with generous ceilings. Every idea includes the reasoning behind it and the practical detail needed to make it work, from beam angles and spacing to colour quality and control.
Why Layers Matter
Layered lighting combines several types of light, each with a separate job. Ambient light provides general brightness, around 100 to 200 lux in a living room. Task light supports focused activities, at around 300 to 500 lux where it is needed. Accent and architectural light add depth, contrast and character.
When one layer tries to do everything, the room looks flat. Think of a ceiling full of identical downlights: technically bright, emotionally empty. When the layers work together, the room gains depth, the eye has places to rest, and you can change the mood simply by switching layers on and off.
Layer One: Ambient Light
1. Work Out How Much Light You Need, Then Place It Around the Furniture
Before choosing fittings, it helps to know roughly how much light the room needs. The unit that matters is the lumen, which measures light output. Watts only measure energy use, and with LEDs they tell you very little about brightness.
A simple way to estimate is to multiply the floor area by your target light level. A 20 sq m living room at 150 lux needs about 3,000 lumens reaching the floor. Because some light is always lost to walls, trims and furniture, add roughly a third, which brings the figure to around 4,000 lumens of fitting output for the ambient layer. This is only a guide, but it stops you from wildly under- or over-lighting the room.
Next, decide where that light should go. Start with the furniture plan rather than a neat grid on the ceiling. Mark the seating group, walkways, the TV and any feature walls, then position fittings to serve them. Light around the seating rather than directly above it, because light from straight overhead creates unflattering shadows on faces.
A common spacing guideline is to keep fittings roughly as far apart as the ceiling is high, and about half that distance from the walls. On a 2.7 m ceiling, that means fittings around 2.7 m apart and 1.2 to 1.4 m from the walls. Wider beams can be spaced further apart, while narrow beams need closer spacing.
2. Choose Glare-Free Recessed Downlights
Glare is the most common reason a living room feels uncomfortable, even when the brightness is right. There are two kinds. Disability glare actually reduces your ability to see, such as a bright light shining into your eyes. Discomfort glare does not stop you seeing but causes a sense of strain that builds over an evening. Living rooms suffer mostly from the second kind.
Well-designed recessed lighting tackles this by setting the light source deeper inside the fitting, often behind a dark inner reflector, a honeycomb louvre or a carefully shaped lens. From most angles you see the light on the floor and walls rather than the bright source itself.
This matters in living rooms because of how we sit. Reclining on a sofa, lying back in an armchair or stretched out on the floor with children, we look upwards far more than in other rooms. A standard downlight with an exposed LED feels harsh from those positions.
When comparing fittings, look at:
- Recess depth and cut-off angle: Deeper recesses hide the source from a wider range of viewing angles.
- Inner finish: Dark reflectors almost disappear when lit, while bright ones draw the eye.
- Unified Glare Rating (UGR): A lower figure means less discomfort glare, useful for comparing fittings.
Jaquar's anti-glare downlights are a practical example of fittings designed with this kind of seated comfort in mind.
3. Use Coves for Soft, Indirect Light
A cove is a recessed channel in the ceiling that hides an LED strip. The strip throws light upwards and across the ceiling, so the whole surface glows softly while the source stays out of sight. Because the light reaches you indirectly, it is gentle, shadowless and very relaxing, which makes coves one of the best ambient options for evenings.
Coves also change the perception of space. A lit ceiling appears higher, and the soft glow at the room's edges makes it feel calm and enveloping.
The construction details decide whether a cove looks elegant or cheap:
- Throw distance: Leave at least 250 to 300 mm between the strip and the ceiling above, so the light fades gradually. A shallow cove produces a bright stripe with a hard edge.
- Concealment: Check sight lines from every seat. The strip should never be visible from where people sit.
- Continuous output: Choose dot-free strips, such as COB strips, for a smooth line without visible beads of light.
- Heat and lifespan: Mounting strips in aluminium profiles helps dissipate heat and extends their life.
- Reflective surface: A white or pale matt interior reflects the most light.
- Access: Plan an access point for drivers so future maintenance does not mean cutting into the ceiling.
Keep the cove on its own dimmer. It is often the only ambient light you need on a quiet evening.
4. Try Linear Profiles Instead of Dots
For contemporary and minimalist interiors, rows of round downlights can look busy. Linear profiles offer a cleaner alternative. They are slim aluminium channels holding a diffused LED strip, recessed into the ceiling or mounted on its surface, and they create continuous lines of light rather than separate points.
Their real strength is structure. A line of light can lead the eye towards a view, mark the centre of a long room, frame a seating area or connect the living area with an adjoining dining space. Because one line replaces several fittings, the ceiling looks calmer.
To use them well:
- Relate the lines to the architecture. Align profiles with walls, windows, furniture or the edges of a rug. Lines at random angles look accidental.
- Run them fully or stop them deliberately. A profile that stops just short of a wall looks like a mistake. Either run it close to the wall or stop it at a clear architectural point.
- Choose the diffuser carefully. Opal diffusers give a soft, even glow for decorative use. Microprismatic diffusers control glare and direct light efficiently, which suits profiles used as the main ambient source.
- Keep the number small. Two or three well-placed lines usually look far better than a ceiling crossed with many.
Suspended versions extend the same language over dining tables, so an open-plan space can share one consistent look across different zones.
5. Rely on Surface-Mounted Fittings Where Ceilings Are Solid
Not every ceiling can take recessed fittings. Concrete slabs, heritage plaster, shallow voids full of ducts and rented homes where cutting into the ceiling is not allowed all call for a different approach. Surface-mounted lighting provides ambient light without any ceiling void at all.
Slim round or square surface downlights in white nearly disappear against a white ceiling and suit quiet, understated interiors. Cylinder lights make more of a statement. In black, graphite or metallic finishes they pair well with concrete, exposed brick, dark joinery and industrial-style furniture.
Because surface fittings are fully visible, they need extra care in planning:
- Alignment: Line them up with walls, windows and furniture so the ceiling looks ordered.
- Cable routes: Without a void, cables need to run in surface conduit or be chased into the ceiling. Agree positions early.
- Beam and spread: Cylinder lights often have narrower beams, which makes them better at creating pools of light than even coverage. Combine them with wall lights or a surface track for softer overall light.
- Proportion: Match the size of fittings to the room. Large cylinders can overwhelm a low ceiling, while tiny fittings can look lost in a large room.
Surface-mounted track systems are another excellent option here, combining direct fixing with adjustable spotlights that can be re-aimed as the room changes.
Layer Two: Task Light
6. Direct a Spotlight at the Reading Chair
Reading needs noticeably more light than the rest of the living room, around 300 to 500 lux on the page, and older eyes need more still. Brightening the whole room to reach that level wastes energy and disturbs everyone else. A focused beam on the reading chair gives the reader what they need while the rest of the room stays calm.
An adjustable spotlight, recessed in the ceiling or mounted on a track, is the simplest solution. Aim it at the chair from behind and slightly to one side, over the reader's shoulder. This keeps shadows off the page and glare out of the reader's eyes.
A few details help:
- Beam angle: A medium beam of around 24 to 36 degrees keeps light on the chair without spilling across the room.
- Tilt range: Choose a fitting with a generous tilt so it can be aimed precisely even if the chair is not directly below.
- Colour temperature: Warm white feels comfortable for evening reading. A slightly more neutral tone suits daytime reading and detailed tasks.
- Switching: Give the reading light its own switch, ideally within reach of the chair, so it can be used without touching the rest of the lighting.
If the chair moves often, a spotlight on a track is the most flexible choice, since it can follow the chair around the room.
7. Add Directional Wall Lights Near Seating
Wall lights bring light down from the ceiling to eye level, where it feels closer and more personal. Directional wall lights, with adjustable heads or focused downward beams, add a practical task element as well, making them ideal where floor space is limited or where you want to avoid extra ceiling fittings.
Beside a sofa, a pair of directional wall lights provides local light for reading, handwork or using a phone without brightening the entire room. Next to an armchair, a single fitting can serve as a dedicated reading light. In a narrow room, wall lights free the ceiling from clutter and make the space feel wider.
How to place them:
- Mounting height: Around 1.5 to 1.8 m for reading positions, so the light falls onto the lap. Decorative wall lights for ambient effect often sit higher, around 1.8 to 2 m.
- Spacing: Around 2 to 3 m apart along a wall gives a pleasant rhythm.
- Beam control: A focused downward beam provides task light, while up-down fittings create softer ambient patterns.
- Wiring: Plan positions before the walls are finished. Wall lights need cables chased into the plaster, and moving them later is disruptive.
Choose fittings with a well-shielded source so the light falls where you want it and does not glare into the eyes of people sitting opposite.
8. Light a Work Nook With Neutral White
Many living rooms now include a small desk or work corner, whether for remote work, study or household admin. Concentration benefits from different light than relaxation does, and treating the work area as its own lighting zone keeps the rest of the room comfortable.
Neutral white, around 4000K, tends to support alertness and focus better than warm white, and it shows paper, screens and colours clearly. Provide around 300 to 500 lux on the desk surface, using an adjustable spotlight, a short linear light or a directional wall light.
Several principles make a work nook comfortable:
- Light the task, not the screen. Position lights so they illuminate the desk and keyboard without reflecting on the monitor. Light from the side is usually best.
- Avoid a dark surround. Working in a pool of light with darkness all around causes eye strain. Keep some ambient light in the room while you work.
- Separate the switching. Put the work light on its own switch so you can turn it off at the end of the day. That simple act helps mark the transition from work to home.
- Keep the rest warm. Neutral light should stay within the work zone. Mixing it with warm light in the same view can look unplanned, so contain it with focused beams.
If the desk is used only during the day, placing it near a window and using task light only as backup gives the best of both.
Layer Three: Accent Light
9. Frame Artwork With Adjustable Spots
A painting, print or photograph under general light becomes part of the background. Give it its own light and it becomes a focal point. Good accent lighting on art relies on three things: angle, beam and colour quality.
Angle. Aim spotlights at the centre of the artwork at about 30 degrees from vertical. This reduces reflections on glass and keeps the frame from casting a shadow over the top edge. To find the position, subtract the height of the artwork's centre from the ceiling height and multiply the result by about 0.58. For a 2.7 m ceiling and art centred at 1.6 m, that gives around 0.64 m from the wall.
Beam. Match the beam to the size of the piece. Small works suit a narrow beam around 24 degrees. Large canvases need wider beams of 36 degrees or more, or two spotlights crossing from either side to avoid a bright centre and dim edges.
Contrast. For the art to stand out, the light on it should be about three times brighter than the surrounding wall. Five times gives a dramatic, gallery-like effect.
Colour and care. High colour rendering (CRI 90 or above) keeps colours accurate. Quality LEDs emit negligible ultraviolet light, which makes them far kinder to paintings, prints and photographs than older halogen lamps.
Adjustable fittings on a track or recessed gimbals let you re-aim when the art changes.
10. Wash a Wall to Expand the Space
The human eye judges a room's size and brightness largely by its walls. A room with bright walls feels more spacious and comfortable than one with a brightly lit floor and dark walls, even when the total light output is the same. Wall washing uses this effect deliberately.
A wall washer spreads light evenly over a wall from top to bottom, often using optics that throw light sideways rather than straight down. It is ideal for painted feature walls, wallpaper, large-format panels, bookcases and gallery walls of photographs.
For an even wash:
- Distance: Place fittings roughly 60 to 90 cm from the wall. Too close produces bright arcs at the top, and too far weakens the effect.
- Spacing: Space fittings about as far apart from one another as they are from the wall, so their light overlaps.
- Height coverage: Check that light reaches the lower part of the wall. A wash that fades halfway down looks unfinished.
- Surface finish: Matt and satin finishes wash smoothly. Gloss finishes and polished stone can reflect fittings.
Wall washing is particularly effective in small rooms, narrow rooms and rooms with low ceilings, where it creates a sense of openness that overhead light alone cannot. It also provides a soft, indirect contribution to the ambient layer, which means ceiling fittings can often be dimmed without the room feeling dark.
11. Graze Textured Materials
Grazing is sometimes confused with wall washing, but it works the other way around. Instead of placing fittings away from the wall for an even result, grazing places them very close, typically 15 to 30 cm away, so the light skims the surface at a steep angle.
At that angle, every ridge, groove and irregularity catches light on one side and casts a small shadow on the other. Brick, natural stone, timber slats, fluted panels, textured plaster and three-dimensional tiles all gain striking depth. A wall that looks ordinary under general light suddenly becomes a feature.
How to graze well:
- Choose the fitting type. A row of narrow-beam spotlights gives a rhythmic pattern of light and shadow. A continuous linear grazer gives an even, uninterrupted effect along the full wall.
- Decide the direction. Grazing downwards from the ceiling is most common and feels natural. Grazing upwards from the floor is more dramatic and suits tall feature walls.
- Frame the wall. Start and finish the effect close to the corners so it looks intentional rather than accidental.
- Consider the surface honestly. Grazing exaggerates everything, including uneven plaster, patchy paint and poor joints. On smooth walls with imperfections, washing is the kinder option.
Match the colour temperature to the material. Warm light suits brick, timber and warm stone, while slightly more neutral light keeps grey stone and concrete crisp.
12. Highlight Shelves and Niches
Shelves and display niches hold the objects that make a living room personal: books, ceramics, photographs, travel souvenirs and collections. Without lighting, they fade into the wall in the evening. Lit carefully, they become some of the most engaging parts of the room.
There are two effective approaches.
Linear light along shelves. Slim LED strips in aluminium profiles, fixed along the front edge of each shelf and angled slightly backwards, light objects evenly from the front. Placing strips at the back instead tends to silhouette objects against a bright panel, which can look dramatic but hides detail.
Focused light in niches. A miniature recessed spotlight at the top of each niche creates a concentrated pool of light, ideal for a single sculpture, vase or special piece. It produces a gallery-like result.
Details that make a difference:
- Colour temperature: Warm white suits wood, leather and warm ceramics. Neutral white keeps glass, crystal and silver bright.
- Reflections: Glass shelves and glossy finishes mirror bare strips. Profiles with diffusers turn the reflection into a soft line.
- Consistency: Light each shelf to a similar level, so no single shelf looks brighter than the rest unless you want it to.
- Driver location: Keep drivers in an accessible spot rather than sealed inside joinery.
Lit shelves also contribute gentle light at mid-height, which softens the room and reduces reliance on the ceiling.
13. Use Track Systems for Changeable Displays
Living rooms evolve. Art is rehung, furniture is moved, new pieces arrive and seasons bring different arrangements. Fixed recessed spotlights are aimed once and rarely touched again, which means the light often ends up pointing at an empty wall. Track systems keep the accent layer as flexible as the room itself.
A track is a channel fixed to or recessed into the ceiling that carries power along its length. Spotlights attach anywhere on the track and can be slid, tilted and rotated freely. Magnetic track systems go further. Modules simply clip into place, and a single track can carry spotlights, linear light modules and small pendant elements.
How to plan a track layout:
- Follow the display walls. Run the track parallel to the walls where art and features will hang, at roughly the distance calculated for the 30 degree aiming angle.
- Frame the room. In larger rooms, a rectangle of track around the seating area can serve walls on every side.
- Mix fittings. Combine narrow spots for art, wider spots for general light and linear modules for soft ambient light on the same track.
- Plan for more. Choose a driver and track length with spare capacity so additional modules can be added later.
Recessed tracks sit flush with the ceiling and look almost invisible. Surface tracks suit solid ceilings and rented homes. Either way, the room's lighting can adapt as quickly as its décor.
Layer Four: Architectural and Hidden Light
14. Backlight the TV
Watching a bright screen in a dark room forces the eyes to adjust constantly between the glowing image and its dark surroundings. Over a film or a long evening of television, that contrast leads to fatigue and even headaches. A soft light behind the screen, known as bias lighting, eases the contrast and makes viewing noticeably more comfortable.
An LED strip mounted behind the television, behind a floating media panel or inside a recessed channel in the wall creates a gentle glow around the edges of the screen. The light should spill softly onto the wall, not shine into the room.
Some practical guidelines:
- Brightness: Keep the backlight far dimmer than the screen. Home cinema enthusiasts often suggest around a tenth of the screen's brightness.
- Colour: A neutral or daylight tone preserves picture accuracy, which film enthusiasts prefer. Warm white blends better with the rest of the room, which most households prefer. Either works.
- Spacing: Mount the strip 5 to 10 cm from the wall so the light can spread.
- Reflections: Keep downlights out of the zone in front of the screen, where they reflect. Light the wall to the sides instead.
- Switching: Give the backlight its own switch or scene so it can become the main light for film nights.
The same technique works for large monitors in a work nook, where it reduces eye strain during long working sessions.
15. Create a Floating Ceiling
A shadow gap is a narrow recess, usually 20 to 50 mm wide, running around the edge of the ceiling where it meets the wall. Fitted with a concealed LED strip, it creates a fine line of light that makes the ceiling appear to float above the room. The effect is subtle but powerful, adding architectural character without any visible fittings.
It suits contemporary interiors where you want detail without decoration, and it is a good alternative to a deep cove in rooms with lower ceilings, since it needs far less depth.
To make it look precise:
- Use purpose-made profiles. Plaster-in aluminium profiles keep the gap perfectly straight and even. Uneven plaster edges become very obvious once lit.
- Keep output modest. The aim is a delicate line of light, not general illumination.
- Resolve corners carefully. The light should turn corners continuously. Gaps or dark spots at corners break the effect.
- Mind the wall finish. Matt paint on the adjoining wall avoids harsh reflections of the strip.
A floating ceiling also makes a beautiful night setting. With every other light off, the glowing perimeter gives just enough orientation to move through the room, and the space still feels complete. It pairs well with wall lights or a cove for evenings when you want a little more light.
16. Add a Low-Level Glow With Skirting and Floating Furniture Light
Most lighting lives in the ceiling, which leaves the lowest part of the room in shadow. A layer of light at floor level changes the character of the space and solves a practical problem: how to move around at night without switching on bright lights.
Skirting and step lights. Recessed LED strips in skirting boards, or small step lights set about 20 to 30 cm above the floor, light walkways gently. They are useful for late-night trips to the kitchen, for children and older family members, and wherever there is a step or change in floor level.
Floating furniture. Wall-mounted media units, consoles and built-in benches look lighter when an LED strip runs along their underside. The glow on the floor separates the furniture from the wall and adds a soft ambient layer near the ground.
A few principles apply to both:
- Keep it very warm and dim. Around 2200K to 2700K at low brightness is restful and does not interfere with sleep.
- Hide the source. Polished stone, glossy tiles and lacquered floors reflect exposed strips as bright lines. Deep profiles with diffusers keep reflections soft.
- Automate if possible. A timer that switches the low-level layer on in the evening makes it useful without anyone searching for a switch in the dark.
Low-level light is often the final touch that makes a room feel professionally designed rather than simply lit.
17. Illuminate Curtains and the Window Wall
After dark, windows become black rectangles, and the wall they sit on often turns into the darkest part of the room. Lighting the curtains from above turns this weakness into a feature. A concealed LED strip in a pelmet or ceiling recess above the curtain track washes the fabric with soft light and gives the window wall a warm, glowing presence.
The effect depends on the fabric. Sheer curtains glow from within and look almost luminous. Heavier fabrics show off their folds, texture and colour. Blinds can be lit in a similar way, though the effect is flatter.
How to install it:
- Position: Mount the strip in a recess or pelmet around 150 to 200 mm in front of the curtain track, angled to graze down the fabric.
- Coverage: Run the strip the full width of the curtains so the light is even from edge to edge.
- Colour: Warm white brings out fabric colours and suits evening use.
- Switching: Give curtain lighting its own circuit. It is useful at specific times, such as evenings and dull days with curtains drawn.
Curtain lighting is especially valuable in rooms where curtains stay closed for long periods, whether for privacy, to block strong sun, or during long winter evenings. It restores some of the brightness and openness that daylight normally brings, and it frames the room beautifully at night.
Layer Five: Quality and Control
18. Pick Colour Temperature With Daylight in Mind
Colour temperature, measured in Kelvin (K), describes whether light looks warm or cool. It shapes the mood of a living room more than almost any other choice.
Colour temperature | Appearance | Typical use in the living room |
2200K to 2700K | Very warm to soft warm | Low-level night light, cosy evenings |
2700K | Warm white | Coves, wall lights, evening ambient light |
3000K | Warm white, slightly crisper | Downlights, artwork, shelves |
4000K | Neutral white | Work nooks, detailed tasks |
5000K and above | Cool daylight | Rarely suited to living spaces |
For most living rooms, 2700K to 3000K works well. The room's daylight can help refine the choice. Rooms that receive cool, indirect light for most of the day, common in rooms facing away from the sun and in cloudier climates, often benefit from warmer artificial light to balance them. Rooms that receive strong direct sun can take a slightly crisper 3000K without feeling cold.
Consistency matters as much as the number. Two fittings labelled 3000K can still look different if their colour consistency varies. Look for tight consistency, often quoted as 3 SDCM or MacAdam steps or less, and source fittings for one room from the same range so the whites match. Mixed whites in the same view make a room look unplanned.
19. Insist on High Colour Rendering
Colour Rendering Index (CRI) measures how faithfully a light source shows colours compared with natural light, on a scale up to 100. It is easy to overlook on a specification sheet, yet it affects everything in the room: the colour of upholstery, the richness of wood, the vibrancy of artwork and, most importantly, how people look.
Under low-CRI light, colours appear muted and slightly grey. Skin looks tired, reds look brown and fabrics lose depth. Under high-CRI light, the same room looks livelier and more natural at the same brightness. For living rooms, a CRI of 90 or above is a sensible minimum.
It is worth looking beyond the headline number to the R9 value, which measures how well a light renders saturated red. Standard CRI calculations do not include it, yet reds are vital for skin tones, warm woods, leather, many textiles and much artwork. A good R9 figure indicates genuinely strong colour quality.
High colour rendering matters most:
- On artwork and collections, where accurate colour is the whole point of the light.
- Over seating, where people's faces should look natural and healthy.
- Near dining areas, where food should look appetising.
- In rooms with rich textiles, such as rugs, cushions and upholstery.
Using high-CRI fittings throughout, rather than only in a few places, keeps colours consistent as your eye moves around the room.
20. Plan for Dimming and Zones Together
A living room hosts very different moments: a lively gathering, a quiet film, a family meal, a late night alone. One brightness level and one switch cannot serve all of them. Dimming and zoning together give you control over both how much light there is and where it goes.
Zones. Divide the lighting into circuits that match how the room is used. A typical plan might include ambient downlights, cove or profiles, wall lights, accent on art and shelves, TV backlight, low-level light and outdoor lighting. With zones in place, you can combine them into scenes: everything on for entertaining, backlight and low-level light for films, cove and wall lights for relaxed evenings.
Dimming. Dimmable fittings let each zone be set to the right level. Reliable dimming depends on compatibility between the fitting, the driver and the dimmer:
- Phase-cut dimming works with standard wall dimmers. Trailing-edge types usually perform better with LEDs.
- 0 to 10V and DALI systems give smoother control and support more complex scenes.
- Test first. Mismatched components cause flicker or buzzing. Try one fitting before installing the full set.
- Check the low end. Fittings that dim smoothly to very low levels are far more useful in the evening.
Even without smart control, wiring each zone separately keeps future upgrades simple. Adding automation later is easy when the circuits exist, and disruptive when they do not.
21. Use Tunable White to Follow the Day
Natural light changes throughout the day, cooler and brighter around midday and warmer towards evening. Our bodies respond to this rhythm, and research on circadian rhythms suggests that bright, cooler light during the day and warmer, dimmer light in the evening support alertness and restful sleep respectively. Tunable white fittings let artificial light follow a similar pattern.
A tunable white fitting can adjust its colour temperature, typically from a warm white around 2700K to a cooler white of 5000K or more. In a living room that is used throughout the day, this brings real benefits:
- Daytime: A cooler, brighter setting keeps the room fresh, useful for homework, working from home or dull, overcast days.
- Evening: Shifting to warm white helps the room feel relaxed and signals the end of the day.
- Night: The warmest setting at low brightness feels calm and restful.
To make tunable white work well:
- Choose which layers need it. Ambient downlights and profiles gain most. Accent lights on art usually look best at a fixed colour temperature.
- Plan the controls. Tunable white needs control of both brightness and colour, so discuss it with your electrician early.
- Use presets. A few simple scenes are more useful day to day than constant manual adjustment.
Tunable white is not essential in every home, but in rooms used from morning to night, it is one of the most effective ways to make artificial light feel natural.
Beyond the Room
22. Extend the Room Outdoors
Many living rooms open onto a garden, terrace or balcony through large windows or glass doors. During the day, the view makes the room feel larger. After dark, if the outside is unlit, the glass turns into a black mirror that reflects the interior back at you, and the room suddenly feels enclosed.
The solution is to add a little light outside. You do not need much, just enough to balance the brightness inside and out so the eye looks through the glass rather than at a reflection.
- Outdoor wall lights beside the doors light the threshold and welcome guests.
- Garden spike lights aimed at trees, shrubs or planters give depth and a focal point beyond the glass.
- Downlights in a covered terrace extend the indoor lighting outwards and make the space usable in the evening.
- Path lighting guides people safely through the garden.
Choose fittings suited to the outdoors. An IP65 rating or higher protects against dust and water, and quality finishes resist corrosion, especially in coastal and humid areas. Keep outdoor light warm and moderate so it complements the interior rather than competing with it, and aim fittings away from neighbours' windows and the eyes of people sitting outside.
A timer or separate switch lets you enjoy the view in the evening without leaving the garden lit all night, and outdoor lighting adds a sense of security as well.
Adapting the Plan to Your Space
Compact rooms: Light the walls more than the floor, keep fittings slim and few, and choose a shadow gap rather than a deep cove to preserve ceiling height.
High or vaulted ceilings: Combine higher-output ceiling fittings with narrower beams and wall lights at human height, so the room does not feel distant. Plan maintenance access before installation.
Open-plan spaces: Vary the fitting type or ceiling treatment between living, dining and kitchen zones to define each area without partitions.
Rented homes: Surface-mounted track systems and wall fittings, installed with the landlord's permission, add flexibility without major works.
Five Mistakes That Undermine a Living Room
- Filling the ceiling with identical downlights and nothing else.
- Mixing warm and cool colour temperatures in the same view.
- Placing downlights directly in front of the TV.
- Ignoring walls, which do more to shape perceived space than floors.
- Wiring everything on one switch.
Conclusion
The best living room lighting ideas start with a simple question: what should this light help you do? Answer that layer by layer, with ambient comfort, focused task light, thoughtful accents and hidden architectural touches, and the room begins to feel balanced at every hour. Warm, accurate, controllable light will do more for your living room than any single statement fitting.
A coordinated range such as Jaquar's, covering downlights, tracks, profiles, strips, and wall and outdoor fittings, makes it easier to plan every layer with consistent colour and quality. That consistency is often what separates a well-lit room from one that is simply bright.
Frequently Asked Questions
- What is the best lighting for a living room? A layered combination works best: ambient light from downlights or coves, task light near reading and work areas, and accent light for art and features. Warm white LEDs with high colour rendering suit most living spaces.
- How many lumens does a living room need? Multiply the floor area in square metres by the target light level. For general living, 100 to 200 lux is typical, so a 20 sq m room at 150 lux needs about 3,000 lumens at floor level, or roughly 4,000 lumens of fitting output once losses are allowed for.
- What is the difference between wall washing and wall grazing? Wall washing spreads even light across a flat surface from about 60 to 90 cm away. Grazing places fittings 15 to 30 cm from the wall so light skims the surface and emphasises texture.
- Is tunable white lighting worth it for a living room? It is valuable if the room is used throughout the day. Cooler light keeps the space fresh and alert in daytime, while warm light in the evening feels relaxing and supports winding down.
- How do I stop windows reflecting the room at night? Light the space outside the glass. A few outdoor wall lights or garden spike lights reduce the mirror effect and extend the view into the garden or terrace.